
Ever snapped a picture that looked like it was taken in a cave? You’re not alone. Many iPhone users find themselves grappling with dim, dreary photos that do their memories a disservice. But fear not! Brightening those lackluster images is easier than finding a cat video on the internet.
Understanding Image Brightness
Image brightness plays a crucial role in photography. Proper brightness enhances the visibility of subjects, reveals details, and sets the mood for photos.
Importance of Brightness in Photography
Brightness influences the overall quality of an image. A well-lit photo attracts viewers and conveys emotions effectively. It highlights essential elements, making them stand out. For example, brightening a portrait can enhance facial features, while a landscape’s vibrancy can draw attention to natural beauty. Dull images often lack interest and fail to engage viewers. Capturing memories becomes more effective with the right brightness, ensuring experiences resonate over time.
Factors Affecting Brightness
Various factors determine an image’s brightness. Exposure settings on the camera influence how light enters. Lighting conditions, such as natural and artificial light sources, also play a significant role. Different surfaces and colors reflect light differently, impacting overall brightness perception. Additionally, editing settings, like contrast and saturation, affect brightness levels. A clear understanding of these elements allows for better adjustments in photography. Knowing how these variables interact helps enhance image quality effectively.
Methods to Brighten A Picture on iPhone
Brightening pictures on an iPhone involves simple methods accessible to all users. These techniques ensure photos capture memories vividly.
Using the Photos App
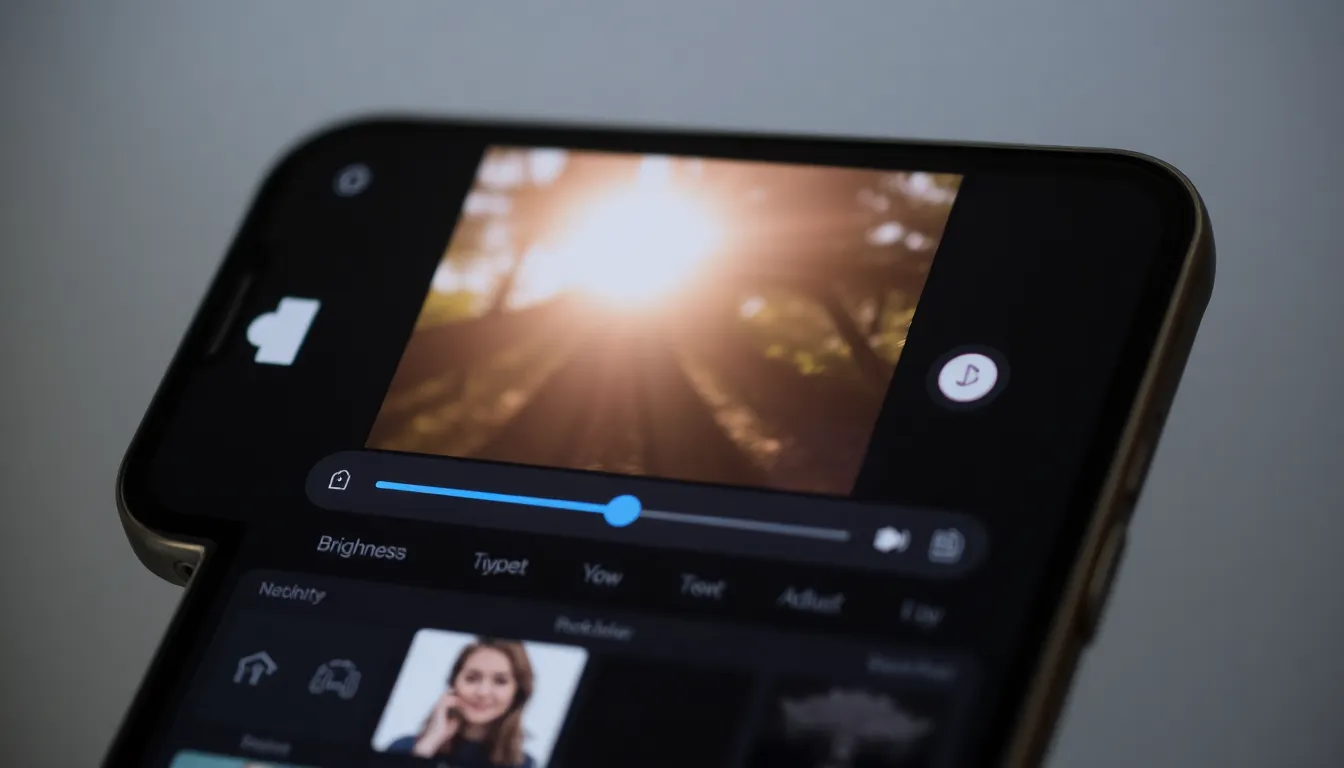
Select the image to brighten within the Photos app. Tap the “Edit” button in the upper-right corner. Adjust the brightness by moving the slider under “Lighting.” Observing the image changes in real-time helps achieve the desired look. When satisfied, click “Done” to save adjustments. A preview function allows for easy comparison between the original and edited versions.
Adjusting Brightness with Editing Tools
Utilize built-in editing tools for a personalized touch. Choose “Adjust” after tapping “Edit,” then find the brightness option. Shifting the brightness slider enhances or reduces the light in the photo. Fine-tuning with options like exposure and highlights provides additional control. Experimenting with contrast can further improve overall picture quality. Each adjustment impacts the visual appeal, enhancing details and depth.
Third-Party Apps for Brightening Photos
Many third-party apps offer advanced features for brightening photos on iPhones. They provide additional tools and controls that enhance the editing experience.
Recommended Apps
Snapseed stands out as a powerful editing app. It includes a brightness adjustment feature and selective editing functions. Lightroom Mobile also excels with its professional-grade editing options, allowing users to manipulate highlights and shadows easily. VSCO provides a user-friendly interface combined with pre-set filters, simplifying the brightness adjustment process. Finally, Afterlight offers unique textures and filters, making it a versatile choice for creative edits.
Features to Look For
When selecting apps, look for intuitive interfaces that streamline the editing process. Comprehensive adjustment options should include sliders for brightness, contrast, and exposure. Additionally, consider apps that support selective editing for fine-tuning specific areas. Integration with social media can be beneficial for seamless sharing. Explore options that offer unique filters or presets for additional enhancements.
Tips for Optimal Brightness
Understanding various techniques can dramatically enhance photo brightness on an iPhone. Effective shooting techniques and post-editing suggestions contribute significantly to improved images.
Shooting Techniques
Capture images in well-lit environments. Natural light often yields the best results, enhancing color and detail. Position subjects away from harsh shadows for balanced lighting. Experiment with different angles to utilize available light effectively. Adjust camera settings like exposure for optimal brightness right from the start. Avoid using zoom, as it can lead to lower image quality and brightness issues. Instead, move closer to the subject when possible.
Post-Editing Suggestions
Utilize the editing tools in the Photos app after taking pictures. Start by adjusting brightness levels, ensuring the image displays all necessary details. Explore options like exposure to further enhance clarity and lightness. Consider using contrast adjustments to make bright areas pop against shadows. Many third-party apps offer advanced tools, allowing selective brightness adjustments for specific sections. Snapseed, for example, enables precise edits to targeted areas. Always preview edits for a seamless comparison before finalizing changes.
Brightening photos on an iPhone is an achievable task that can transform dim images into vibrant memories. By utilizing the built-in editing tools in the Photos app users can make quick adjustments that enhance clarity and detail. Experimenting with third-party apps further expands editing capabilities allowing for more creative freedom.
Capturing images in well-lit settings and adjusting camera settings can significantly improve brightness from the start. With a little practice and the right techniques anyone can elevate their photography skills and ensure their pictures truly reflect the beauty of their experiences.